The heart of the project ❤️
Welcome to our Upload Guide, an easy guide to follow when creating your release on RouteNote. If you have any specific or difficult questions, feel free to search your question on our Support Hub, email us at support@routenote.com or use our Contact Us form.
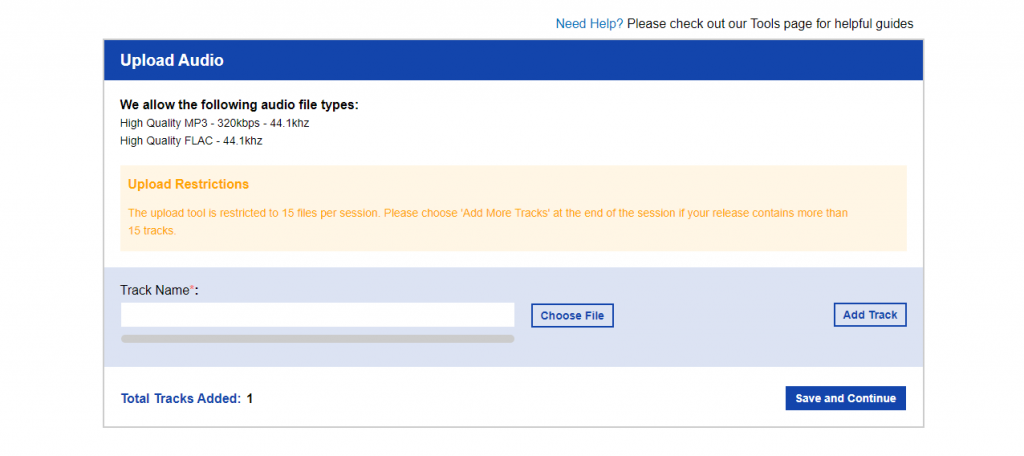
Here’s where to add that all-important track.

Under Track Name is where you put the title for your song. If your release is an album or EP, then this is will be the title of the first song on the album/EP. If your release is a single, this will be the name of your only song on the release.
After this, click on Choose File.

Once you’ve selected your audio file, it’ll start uploading.

If your file doesn’t reach 100%, click here for our article for further help.
Once you’ve finished uploading all your tracks, you can go ahead and click on Save and Continue.
If you want to add more tracks, click Add Track and follow the same process. Please note! You’re able to upload up to 15 tracks at a time. Firstly, upload the initial 15 tracks, then add the details for these tracks. Once this has been done, then select Add more tracks and add a further 15 tracks and add the track details for each one. And so on! This will ensure a smooth upload to the site.

When you’ve finished uploading your tracks, click Save and Continue.

Which will lead us to the next part…How do I fill Audio Metadata?
Skip to section:
How do I fill Audio Metadata?
How do I upload my artwork?
How do I fill the Manage Stores section?
How do I finalise my release and send to moderation?
Return to section:
How do I open and start a new release on RouteNote?
How do I fill my Release Data page; UPC and Release Title?
How do I navigate my release in-progress main page?
How do I fill Album Details?
Please see RouteNote’s Upload Guide in video format!